How to Plant Graviola Seeds
Graviola Seed Preparation
How to plant graviola seeds – Successfully cultivating graviola plants begins with proper seed preparation. This involves cleaning, testing viability, and potentially scarifying the seeds to enhance germination rates. Careful preparation significantly increases your chances of a healthy and productive graviola tree.
Cleaning and Preparing Graviola Seeds
Begin by gently removing the pulp surrounding the graviola seeds. Thoroughly rinse the seeds under running water to eliminate any remaining pulp. Allow the seeds to air dry in a shaded area for several hours, ensuring they don’t become desiccated. This process prevents fungal growth and improves seed health.
Seed Viability Testing
Assessing seed viability is crucial. A simple test involves placing a small sample of seeds in a damp paper towel within a sealed plastic bag. Keep the bag at room temperature. After a few days, check for signs of germination – a small sprout emerging from the seed indicates viability. Seeds that fail to germinate should be discarded.
Graviola Seed Scarification
Graviola seeds often benefit from scarification, a process that weakens the hard outer seed coat to facilitate germination. This can be achieved through several methods, including mechanical scarification (gently nicking the seed coat with a sharp knife) or chemical scarification (soaking seeds in a dilute sulfuric acid solution for a short period). However, mechanical scarification is generally safer and more readily accessible for home growers.
Comparison of Seed Preparation Methods
| Method | Description | Advantages | Disadvantages |
|---|---|---|---|
| No Treatment | Seeds are sown directly after cleaning. | Simple and quick. | Lower germination rates, longer germination time. |
| Mechanical Scarification | Gently nicking the seed coat. | Improved germination, faster germination. | Requires care to avoid damaging the embryo. |
| Soaking in Water | Soaking seeds in water for 24-48 hours. | Softens the seed coat. | May lead to fungal growth if not done properly. |
Sowing Graviola Seeds
The success of graviola cultivation hinges on providing the seeds with optimal sowing conditions. This includes selecting the appropriate soil, maintaining suitable temperature and humidity levels, and employing effective sowing techniques.
Optimal Sowing Conditions
Graviola seeds thrive in well-draining, slightly acidic soil (pH 6.0-6.5). A temperature range of 25-30°C (77-86°F) and high humidity (around 70-80%) are ideal for germination. Consistent moisture is essential, but avoid waterlogging.
Sowing Methods
Graviola seeds can be sown directly into the ground or started in seedling trays. Direct sowing is simpler but may result in lower germination rates and increased susceptibility to pests. Seedling trays offer better control over the growing environment, promoting higher germination and seedling survival.
Planting Media
A well-draining potting mix is crucial. Commercial seed-starting mixes are suitable, or you can create your own blend using peat moss, perlite, and vermiculite. Avoid using garden soil directly, as it may contain pathogens.
Sowing Graviola Seeds in Seedling Trays: A Step-by-Step Guide

Source: kumarafood.com
- Fill seedling trays with moist potting mix.
- Sow seeds about 1 cm (0.4 inches) deep and 2-3 cm (0.8-1.2 inches) apart.
- Gently cover the seeds with potting mix.
- Water gently, ensuring the soil remains moist but not soggy.
- Cover the trays with clear plastic to maintain humidity.
- Place the trays in a warm, shaded location.
Graviola Seedling Care: How To Plant Graviola Seeds
Providing proper care during the seedling stage is critical for the healthy development of graviola plants. This involves carefully managing watering, light exposure, and addressing potential pests and diseases.
Watering Graviola Seedlings

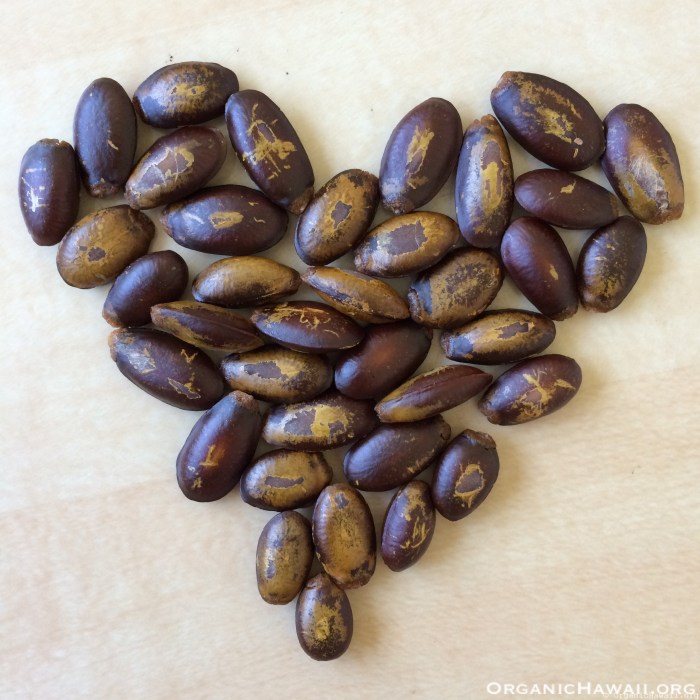
Source: organichawaii.org
Water seedlings regularly, keeping the soil consistently moist but not waterlogged. Reduce watering frequency as seedlings mature. Overwatering can lead to root rot, while underwatering can stunt growth. Adjust watering based on environmental conditions; hotter and drier conditions require more frequent watering.
Sunlight and Shade
Graviola seedlings require bright, indirect sunlight. Avoid direct, intense sunlight, especially during the hottest part of the day, which can scorch the delicate leaves. A shaded location during the midday sun is beneficial.
Seedling Diseases and Pests

Source: com.au
Common pests include aphids and mealybugs. Inspect seedlings regularly for signs of infestation. Use insecticidal soap or neem oil to control pests. Fungal diseases can also affect seedlings. Ensure good air circulation and avoid overwatering to prevent fungal growth.
Hardening Off Seedlings
Before transplanting, gradually acclimate seedlings to outdoor conditions. Start by exposing them to short periods of direct sunlight and gradually increase the duration over several days. This hardening-off process prepares seedlings for the more challenging outdoor environment.
Transplanting Graviola Seedlings
Transplanting graviola seedlings requires careful consideration of timing, spacing, and environmental conditions to ensure successful establishment and future growth.
Transplanting Graviola Seedlings: A Step-by-Step Guide
Once seedlings have developed several true leaves (typically 4-6 weeks after germination), they are ready for transplanting. Gently remove seedlings from their trays, taking care not to damage the roots. Plant them in larger containers or directly into the ground, ensuring the soil is well-draining and slightly acidic. Water thoroughly after transplanting.
Ideal Transplanting Time
The best time to transplant is during the warm season, after the last frost, when the soil is warm and moist. This allows seedlings to establish strong root systems before the onset of colder weather.
Spacing Between Seedlings
Maintain adequate spacing between seedlings to prevent overcrowding and competition for resources. Space seedlings at least 1-2 meters (3-6 feet) apart, depending on the expected mature size of the plant.
Ideal Transplanting Conditions
| Growth Stage | Ideal Soil Conditions | Ideal Temperature (°C) | Ideal Humidity (%) |
|---|---|---|---|
| Seedling (4-6 weeks) | Well-draining, slightly acidic potting mix | 25-30 | 70-80 |
| Young Plant (6 months-1 year) | Well-draining, slightly acidic soil | 20-35 | 60-75 |
Graviola Plant Care (Post-Transplant)
Ongoing care is essential for healthy graviola plants after transplanting. This includes regular watering, fertilization, pruning, and mulching.
Ongoing Maintenance
Water regularly, especially during dry periods. Fertilize with a balanced, slow-release fertilizer every few months. Avoid over-fertilizing, which can damage the plant. Pruning helps to maintain the plant’s shape and encourage fruit production. Remove dead or diseased branches and any suckers growing from the base of the plant.
Mulching
Applying a layer of organic mulch around the base of the plant helps retain soil moisture, suppress weeds, and regulate soil temperature. Use materials such as wood chips, straw, or shredded leaves.
Pruning
Pruning should be done selectively to remove dead, diseased, or crossing branches. This improves air circulation, light penetration, and overall plant health. It also encourages the development of stronger branches and potentially increases fruit production.
Visual Representation of a Healthy Graviola Plant
A mature, healthy graviola plant typically reaches a height of 5-10 meters (16-33 feet) and has a broad, spreading canopy. The leaves are large, dark green, and oval-shaped with smooth edges. The branches are strong and relatively thick, bearing numerous leaves. The trunk is generally straight and relatively sturdy. The plant displays vigorous growth and a healthy, vibrant green color.
Troubleshooting Graviola Growth
Despite optimal care, graviola plants can encounter various problems. Understanding these issues and their solutions is crucial for successful cultivation.
Common Problems and Their Causes
Yellowing leaves can indicate nutrient deficiencies (especially nitrogen or iron), while leaf spots may suggest fungal diseases. Wilting could be due to underwatering, root rot, or pest infestations. Stunted growth might result from nutrient deficiencies, poor soil drainage, or insufficient sunlight.
Disease and Pest Prevention
Regularly inspect plants for signs of pests and diseases. Maintain good sanitation practices, removing fallen leaves and debris. Use preventative measures such as insecticidal soap or neem oil to control pests. Ensure proper watering to prevent fungal diseases.
Nutrient Deficiencies
Conduct a soil test to determine nutrient levels. Amend the soil with appropriate fertilizers to correct deficiencies. Use a balanced fertilizer to provide a wide range of essential nutrients.
Environmental Factors, How to plant graviola seeds
Extreme temperatures, prolonged drought, or strong winds can negatively affect graviola plant growth. Provide protection from harsh weather conditions if necessary, such as windbreaks or shade cloth during hot periods.
Essential FAQs
Can I use store-bought graviola seeds?
While possible, store-bought seeds may have lower viability. Check for freshness and follow seed preparation steps carefully.
How long does it take for graviola seeds to germinate?
Germination time varies but typically ranges from a few weeks to several months, depending on seed viability and environmental conditions.
What should I do if my graviola seedlings look weak or unhealthy?
Check for pests, diseases, or nutrient deficiencies. Adjust watering, sunlight exposure, and consider using a balanced fertilizer.
Can I grow graviola in a pot?
Yes, graviola can be grown in large containers, but eventually it will need transplanting to the ground for optimal growth and fruiting.


